Building a retainer wall is more than a weekend landscaping project, it’s a structural investment in your property. Whether you’re levelling a sloped block, creating usable yard space, or retaining soil for an extension, the long-term success of your wall depends on what’s happening below ground.
Cutting corners on footing is the fastest way to end up rebuilding the same wall in five years.
In this guide, we’ll break down everything Australian homeowners and DIYers need to know about retaining wall footing design, depth requirements, drainage considerations, and how to build a foundation that lasts especially if you’re building a retainer wall with modern composite or concrete sleeper systems.
Why Is Footing So Important?
The footing is the structural base that supports the entire retaining wall. It distributes load, resists soil pressure, and prevents movement caused by:
- Expansive clay soils
- Heavy rainfall and water build-up
- Poor compaction
- Excess wall height or surcharge loads (driveways, structures, fences)
Without a proper retaining wall footing design, even the strongest wall material will eventually fail.
This is particularly important in Australia, where soil conditions vary dramatically from reactive clay in Victoria and NSW to sandy soils in coastal areas and rocky ground in QLD and WA.
No matter what material you choose timber, concrete blocks, or composite sleepers the footing determines whether your wall lasts 10 years or 100.
How Deep Should a Retaining Wall Footing Be?
One of the most common questions we hear is: how deep should a retaining wall footing be?
The recommended footing depths for a single-tier retaining wall are:
| Wall Height (H) | Footing Depth (D) | Footing Spacing (S) | Pile Diameter (PD) |
| 400mm | 600mm | 2400mm | 300mm |
| 600mm | 800mm | 2400mm | 450mm |
| 800mm | 1000mm | 2000mm | 450mm |
| 1000mm | 1200mm | 2000mm | 450mm |
These depths apply under the following conditions:
- Soil Type 1.1 (5kPa)
- No fence attached
- Backfill surcharge of 5kPa
- Unit weight 19kN/m³
- Friction angle 26°
- Drained cohesion 5kPa
It’s important to note that foundation depth can change depending on site soil conditions. A geotechnical assessment may be required for reactive or unstable soils.
Installing a Fence on Top?
If you are adding a 1.8m high fence (Wind Region B, full shielding), increase foundation depth by +200mm beyond the table above.
This is a critical detail many DIY installers miss, and underestimating wind load is one of the fastest ways to compromise long-term performance.
Key Factors That Affect Footing Depth
There is no one-size-fits-all answer. The depth and design of your footing will vary based on:
1. Soil Type
- Clay soils expand and contract with moisture changes, requiring deeper and more stable footings.
- Sandy soils drain well but may require wider bases to prevent shifting.
- Rocky ground may reduce depth requirements but increase excavation costs.
If you’re unsure, consider a soil test or consult a structural engineer.
2. Wall Height and Load
The taller the wall, the greater the lateral pressure from retained soil. If the wall supports additional loads (such as a driveway or structure), deeper post embedment and stronger footing systems are required.
This is particularly relevant when comparing materials. For example:
- Timber may rot over time.
- Concrete blocks require precise block wall footing detail to prevent cracking.
- Composite or reinforced systems provide superior structural performance with less mass.
3. Drainage and Water Management
Poor drainage is the number one cause of retaining wall failure.
According to retaining wall drainage Australian standards, adequate drainage behind the wall is critical. This includes:
- Agricultural (ag) pipe at the base
- Free-draining gravel backfill
- Geofabric separation
- Weep holes where required
Water build-up increases hydrostatic pressure and no footing can compensate for that.
When planning your retaining wall footing ideas, always consider how water will move through and away from the structure.
How to Properly Install SuperSleeper Posts and Footings
When building a retaining wall with composite sleepers, correct post installation is essential to performance and longevity.
Below is the recommended process based on the SuperSleeper install guide.
Step 1: Setout
- Run a string line to mark the front face of the wall.
- Mark post locations according to required spacing (2000mm or 2400mm depending on wall height).
- Ensure posts will sit centrally within each excavated hole.
Step 2: Excavation and Foundations
- Excavate post holes to the required depth (see table above).
- Ensure correct pile diameter (300mm–450mm depending on wall height).
- Prepare concrete to a minimum strength of 20 MPa, or as specified by your engineer.
Step 3: Setting the Posts
- Pour concrete into the hole.
- Ensure the post is centred.
- Lean the post slightly back toward the retained soil at approximately 1 in 10 batter.
- Trowel the top of the concrete flat and level.
- Form a concrete pad approximately 225mm either side of the post.
- Finished post height should be 10mm higher than final wall height.
This slight backward lean helps counteract soil pressure over time.
Step 4: Installing the Bottom Sleeper
- Slide a SuperSupport onto each end of the bottom sleeper (grooved side facing down).
- Lower the SuperSleeper between posts.
- Rest it on the flat concrete pad.
Lock into place using a SuperWedge (suitable for posts up to 120mm).
Step 5: Stacking Subsequent Sleepers
- Place each sleeper level and properly engaged.
- Continue stacking and wedging until required height is reached.
- Follow engineered design height limits.
Step 6: SuperCap (If Required)
If installing SuperCap:
- Post height must be 21mm higher overall than concrete base.
- Fix cap using galvanised wafer head screw through face into post.
Step 7: Drainage Installation
Drainage remains critical for wall longevity.
- Install agg pipe at base.
- Ensure pipe slopes toward a legal drainage point.
- Backfill with SuperDrain or other free-draining material.
- Compact properly.
Poor drainage is the number one cause of retaining wall failure in Australia.
Why This Matters
Many retaining wall failures aren’t caused by the sleeper material, they’re caused by:
- Incorrect pier depth
- Insufficient concrete strength
- Incorrect spacing
- No batter on posts
- Fence loads not accounted for
- Poor drainage
By following AS4678-compliant installation guidance and correct footing depths, you dramatically increase the lifespan of the wall.
And when paired with lightweight, high-strength composite SuperSleeper, you get a system that is:
- Faster to install
- Easier to handle
- Structurally compliant
- Designed for Australian conditions
Comparing Footing Requirements by Material
Not all retaining walls are equal and neither are their footing demands.
| Material | Footing Complexity | Lifespan | Key Considerations |
| Treated Timber | Moderate | 10–20 years | Rot, termite risk |
| Concrete Blocks | High | 30–50+ years | Requires engineered concrete retaining wall footing |
| Traditional Concrete Sleepers | Moderate–High | 50+ years | Heavy (approx. 80kg each) |
| Composite Sleepers (SuperSleeper) | Moderate | Up to 100 years | Lightweight (6kg), strong, sustainable |
While some homeowners focus purely on upfront cost, long-term durability matters. A poorly designed footing combined with low-grade materials can lead to early failure.
If you’re evaluating counterfort retaining wall lifespan, structural reinforcement improves longevity but increases cost and complexity.
Modern composite systems provide strength without excessive weight, simplifying installation while maintaining structural performance.
DIY vs Hiring a Professional
Many people start by searching:
- how to build a retaining wall? – bunnings
- how to build a brick retaining wall Australia
- how to build a retaining wall with concrete blocks
DIY is absolutely possible for lower walls under 1 metre. However, once you exceed that height or if soil conditions are reactive engineering input is strongly recommended.
A structural failure is far more expensive than professional advice upfront.
Build It Once, Build It Right
When building a retainer wall, the footing is not the place to cut costs.
The right depth, proper compaction, effective drainage, and quality materials all combine to determine how long your wall will last.
If you want a wall that stands strong for decades not just years, material choice matters just as much as footing preparation.
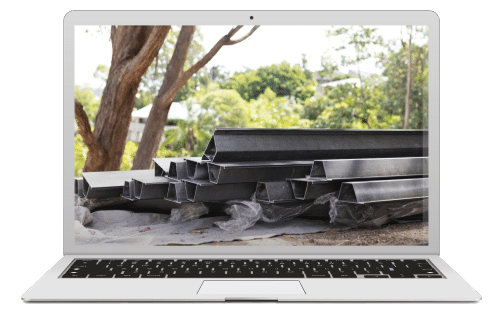
At SuperSleeper, we’ve developed a lighter, stronger, and more sustainable alternative to traditional concrete sleepers. Our composite retaining wall systems are engineered for durability, easier installation, and long-term performance with a lifespan of up to 100 years.
Don’t build it twice. Browse our range of reinforced composite sleepers and heavy-duty steel posts at SuperSleeper today.